How to install Windows 11 from USB
Before you start
Please ensure you have your valid product key ready before following these installation steps. If you don't have one, purchase one here.
To do this, we’ll divide the process into two parts. First, we’ll tell you how to create your installation USB, and then we’ll explain step-by-step how to boot that USB on the computer where you want to install it. Windows 11.
First, create an installation USB
The first step you have to take is to create a Windows 11 installation USB. To do this, you have to go to the Windows 11 download website, whose address is Microsoft.com/es-es/software-download/windows11. In here, click on the button download now from the section Create Windows 11 installation media. This is where you will download the file mediacreationtool.exe, which is the one used to create your installation USB.
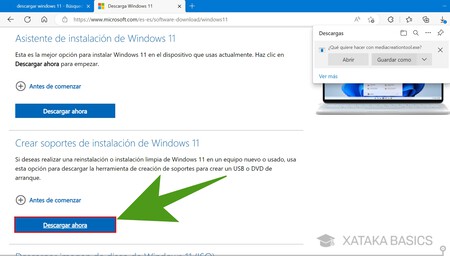
Figure 1: Download the Creation Tool
Now, you have to open the application mediacreationtool.exe. The first screen you’ll see is the one to accept the tool’s license terms. You have to press the button Accept, since without approving the terms you will not be able to use it.
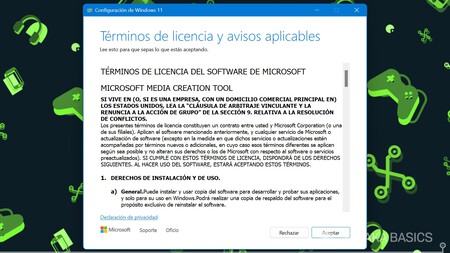
Figure 2: Accept License Terms
You’ll now be taken through a series of steps to configure the USB drive you’re about to create. The first step is to choose the Windows 11 edition and language you want to use. By default you will have it with a recommended configuration which will be correct, and you will only have to click on Next to continue. You can disable the option to use recommended options if you want to change something, but it’s not usually necessary. Press Next to continue.
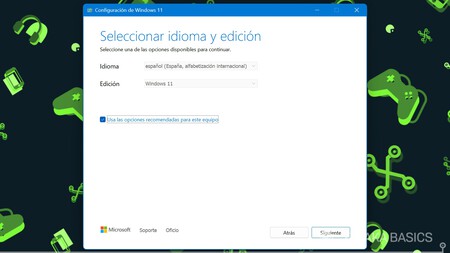
Figure 3: Select Language and Edition
Now you will go to the step where you have to choose the medium to use. Here, you must select option USB flash drive. By doing so, you’ll create a bootable USB. With the other option, you’ll only download the ISO file, which you can also use later to create a bootable USB, but with this option, it’ll be done automatically. When you do this, press Next.
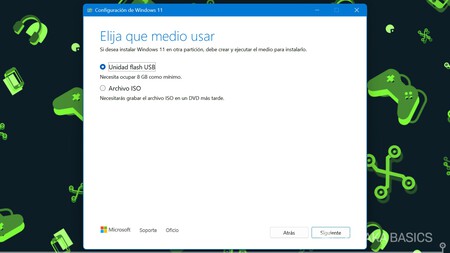
Figure 4: Choose Media Type
Install Windows 11 from a USB
Once you have the bootable USB drive configured, you need to connect it to the computer where you plan to install the operating system. The computer must be turned off, and When you turn it on, press the key assigned to it to choose which drive to boot from. The key to press depends on the manufacturer and can be anything from Escape to one of the F1 to F12 keys. Try it out, and when the screen appears, choose the USB from the list of drives to start the computer from it.
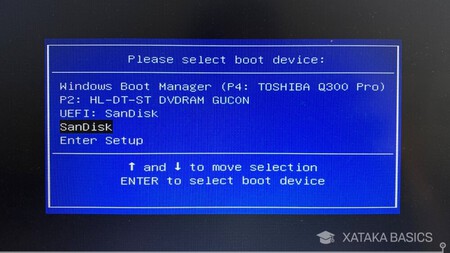
Figure 5: Select USB Boot Device
When you boot the installation USB you downloaded, the first thing you’ll see is a screen to choose the version of Windows 11 to install and the language, and they will be the ones you configured in the previous process. Press on Next to confirm the selection and continue.
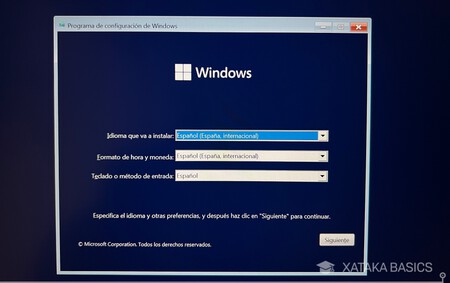
Figure 6: Confirm Language Settings
And on the next screen, click on the button Install Now that appears in the center to proceed with the installation. In the lower right corner of the screen, you’ll also have the option to repair your computer in case you already have Windows 11 but it’s not working properly.
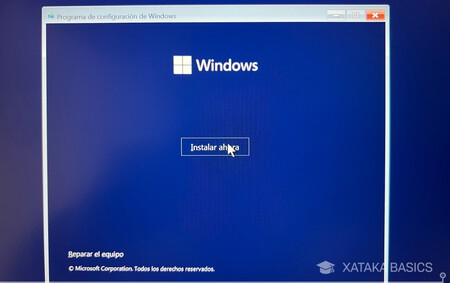
Figure 7: Start Installation
And that’s it. This will begin the installation process from the USB drive. Now all you have to do is accept the license terms and continue through the setup menu. Once you complete these steps, your computer will continue installing Windows 11, a process that may take a while.
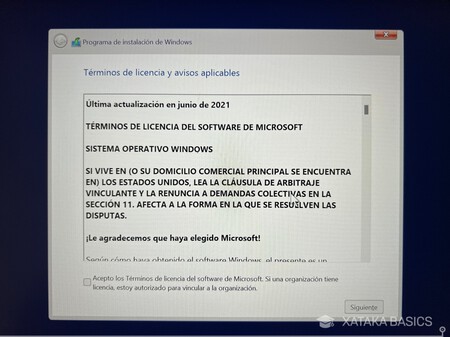
Figure 8: Installation in Progress