

How to install Windows 10 Pro
Before you start
Please ensure you have your valid product key ready before following these installation steps. If you don't have one, purchase one here.
For years, Windows 10 was the most widely used operating system on computers around the world, powering hundreds of millions of devices. While Microsoft officially ended free support for Windows 10 on October 14, 2025, many users still need to install it whether to revive an older PC that can’t run Windows 11, set up a virtual machine, or keep a familiar workflow on hardware that doesn’t meet the newer system requirements.
If you’re thinking of installing Windows 10 from scratch, upgrading from an earlier version, or doing a clean reinstall, here’s everything you need to know to install this version of the operating system safely and correctly in 2026.
The first step is checking whether your computer meets the minimum system requirements to run Windows 10. If it doesn’t, you’ll need to decide whether to upgrade your hardware or consider buying a new PC that supports Windows 11 instead.
Important Details Before You Start
Windows 10 is one of the most important versions Microsoft has ever released. It’s installed on millions of PCs worldwide and there’s a lot to understand before diving into the installation process especially now that the OS no longer receives security updates unless you enroll in the Extended Security Updates (ESU) program, which runs through October 13, 2026.
Why Install Windows 10 from Scratch?
There are several reasons you might want to install the operating system from scratch. The most common is fixing a PC that’s giving you trouble a clean install attacks the root cause when troubleshooting hasn’t worked. You may also want to install Windows 10 on a separate partition for dual-booting, set it up in a virtual machine for testing, or replace another operating system entirely to take advantage of Windows 10’s broad software compatibility and familiar interface.
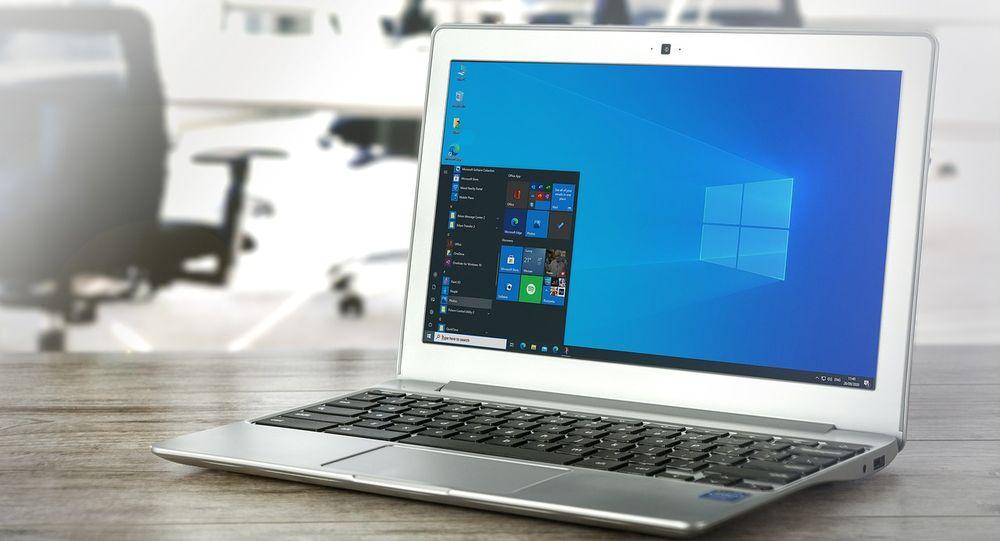
Figure 1: Windows 10 on Laptop
A very frequent reason to install it is that many desktop and laptop computers, especially gaming, although you will see this trend in many others, they come without factory pre-installed Windows. This reduces their cost, since they do not have to pay the extra for the license.
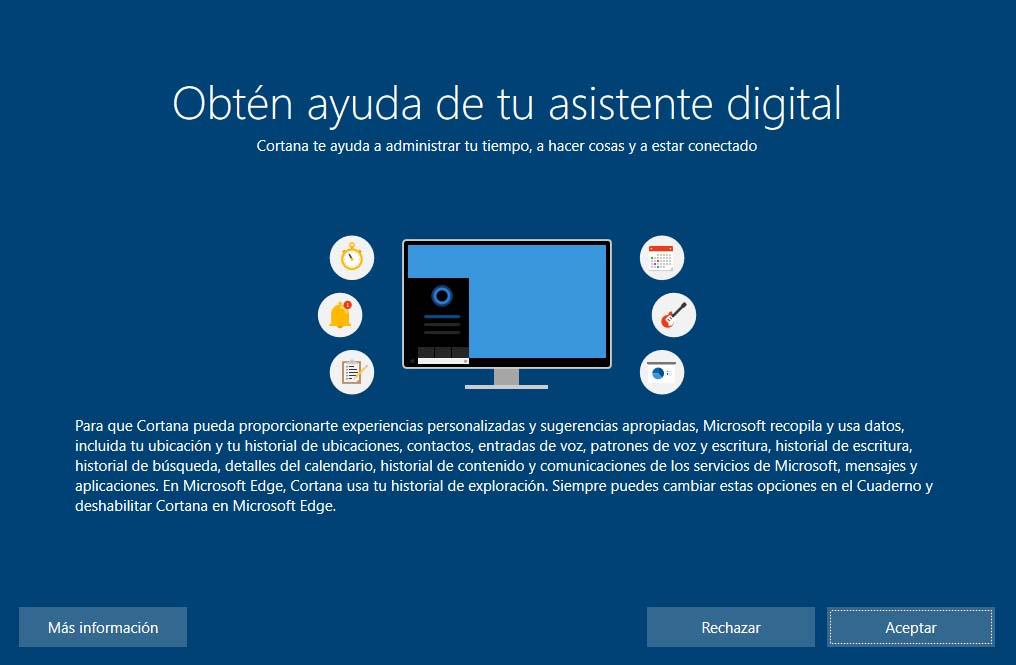
Also, if you don’t have much hardware, it’s an excellent option, since it consumes very few computer resources. It also has your own virtual assistant (Cortana) and is the first cross-platform and multi-device operating system.

Figure 2: Cortana Assistant
System Requirements
Microsoft establishes a series of basic requirements for installation. Requirements at the hardware level that will guarantee the proper functioning of the system after its installation.
- Processor: 1 GHz or faster compatible processor or SoC. Must support PAE, NX, and SSE2 features.
- RAM: 1 GB for 32-bit or 2 GB for 64-bit.
- Hard disk space: 16 GB for 32-bit OS or 32 GB for 64-bit OS.
- Graphic card: DirectX 9 or later with WDDM 1.0 driver.
- Screen: Minimum resolution of 800 x 600 pixels.
- Internet connection: Required for updates and initial setup.

Figure 3: System Requirements Check
Available license types
It is important to know the existing types of licenses available:
- Home: The most basic version for standard users.
- Pro: Includes Remote Desktop, BitLocker, and business tools.
- Pro for Workstations: For high-performance hardware and professionals.
- Education / Enterprise: Specific versions for schools and large organizations.
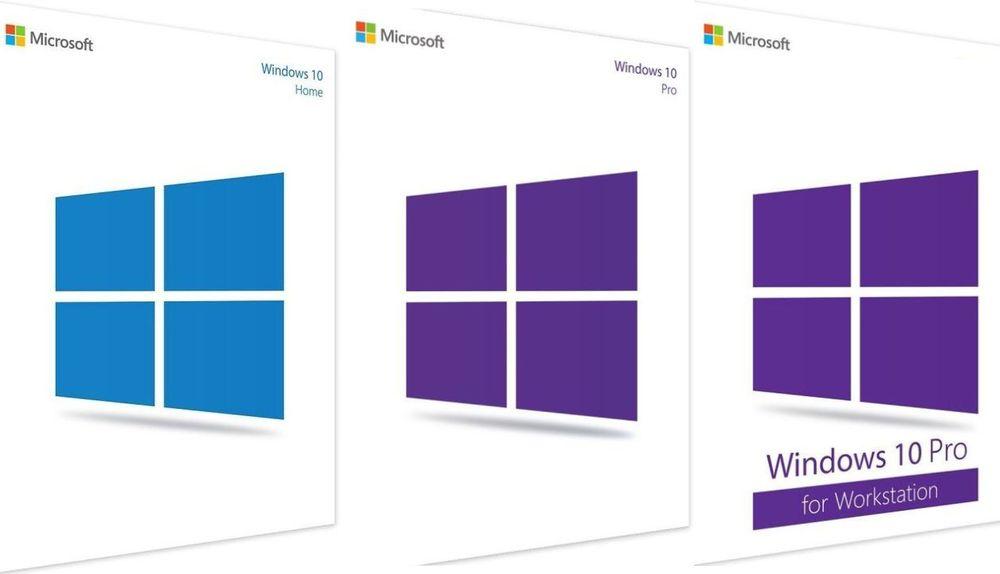
Figure 4: License Editions
Create USB or DVD for your installation
To install Windows 10, we first need to create an installation medium. We will download the Media Creation Tool from the Microsoft website.
Steps to create media:
- Execute the Media Creation Tool and accept terms.
- Choose Create installation media.
- Select language, architecture, and edition.
- Choose USB flash drive (requires 8GB+) or ISO file (for DVD).
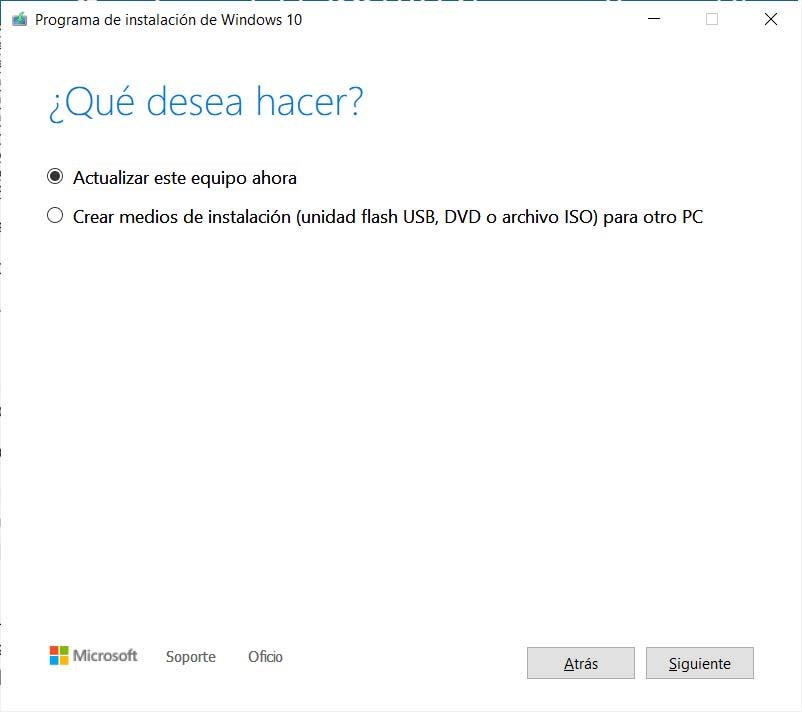
Step 1: Create Media
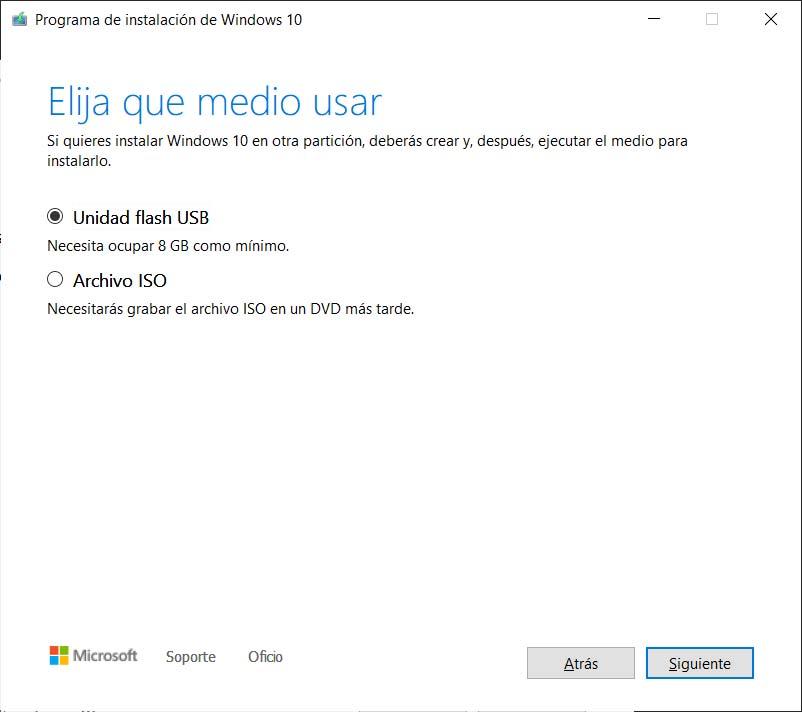
Step 2: Select USB or ISO
Configuration to boot from USB or DVD
Once the media is ready, you must configure the BIOS/UEFI to boot from it:
- Restart and press F2, F8, F12, or Delete (depending on manufacturer) to enter BIOS.
- Alternatively, go to Settings > Update & Security > Recovery > Advanced Startup.
- In the BIOS Boot tab, set the USB or DVD as the primary boot device.
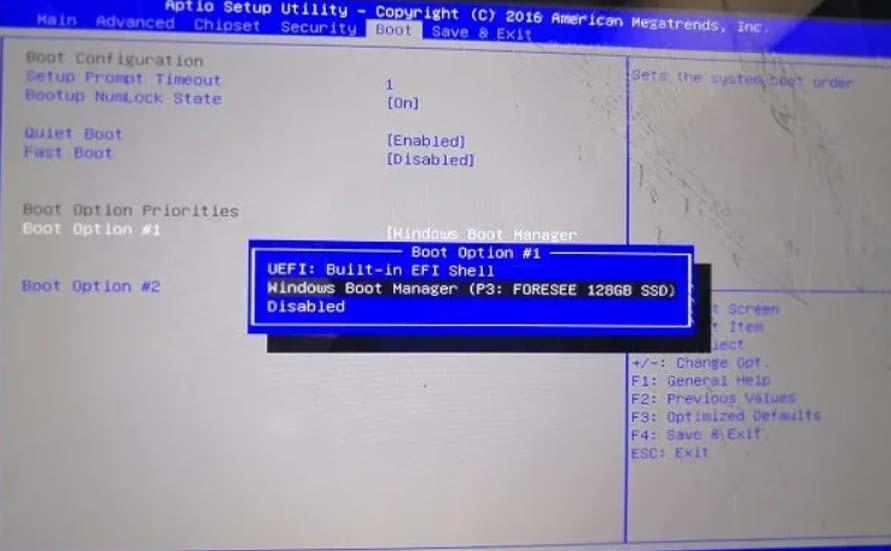
Figure 5: BIOS Boot Selection
How to install Windows 10 step by step
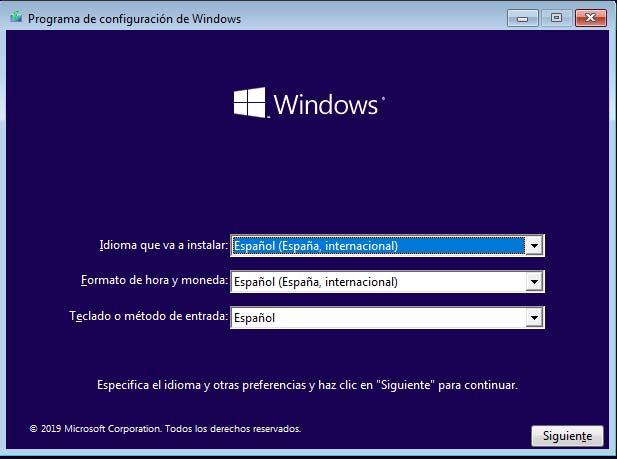
1. Language Selection: Choose language, time format, and keyboard method. Click Next and “Install Now”.
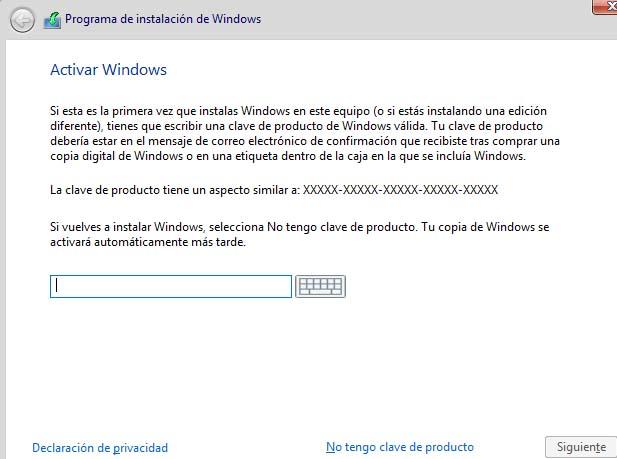
2. Product Key: Enter your license key. If you don’t have one yet, click “I don’t have a product key”.
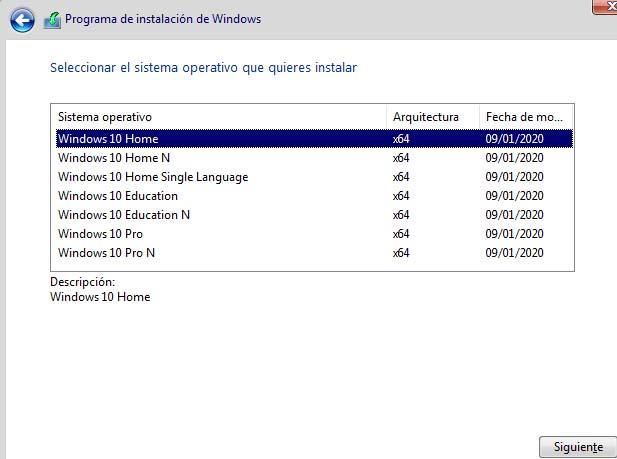
3. Select Version: Choose the version matching your license (Home, Pro, etc.).
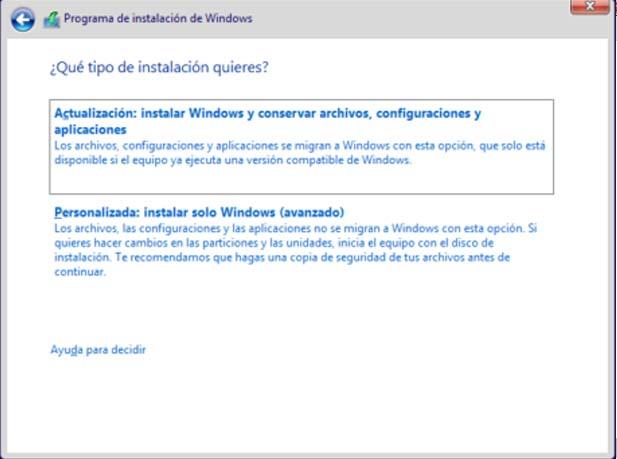
4. Installation Type: Select Custom: Install Windows only (advanced) to perform a clean install.
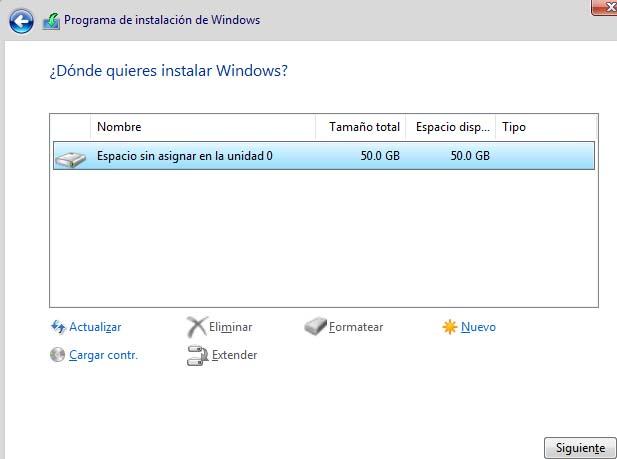
5. Partitions: Select the drive/partition to install Windows. You can delete old partitions here to clean the drive.
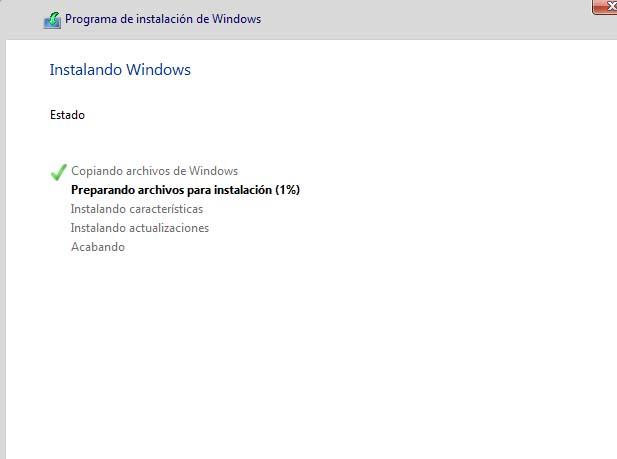
6. Region & User Setup: After copying files, the PC will restart. Select your region and keyboard layout.
7. Account Setup: Log in with a Microsoft account or create a local offline account. Set up a PIN if desired.
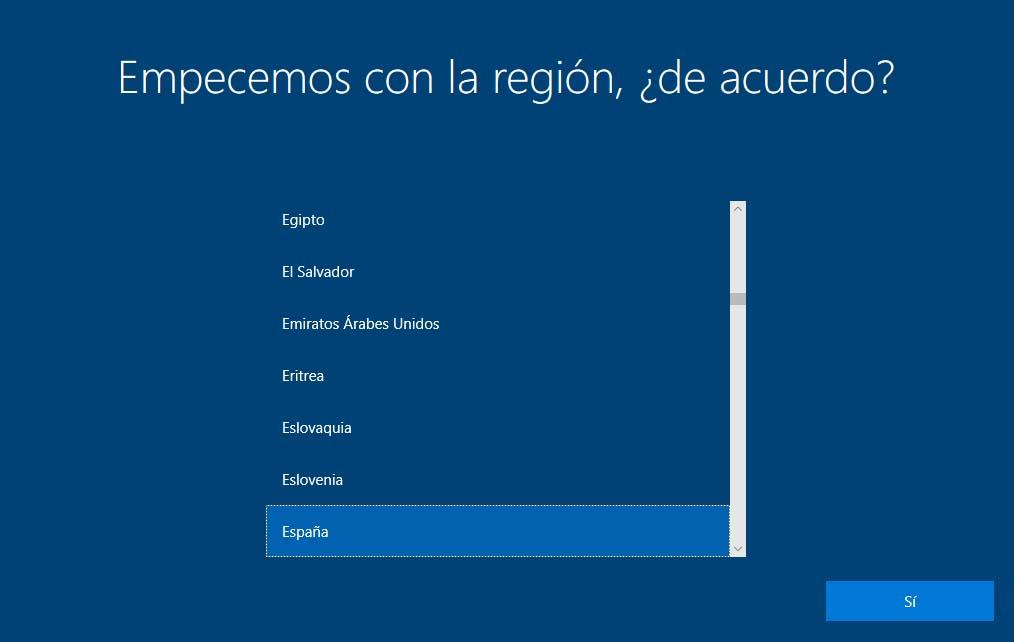
8. Privacy Settings: Configure privacy options (Location, Diagnostic data, Find my device, etc.).
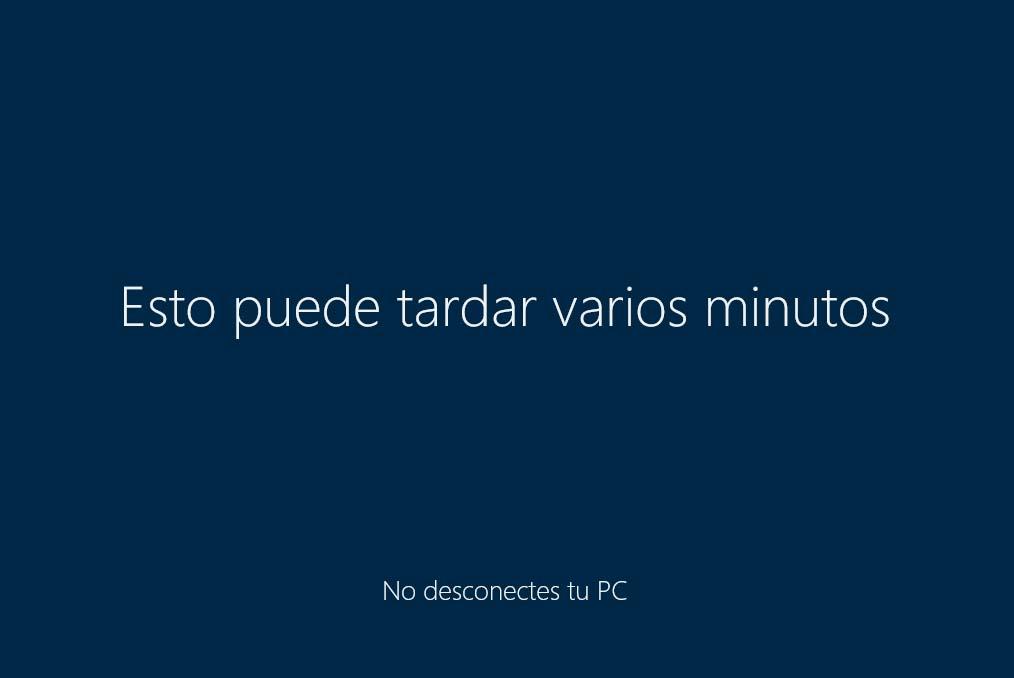
Finally, the system will prepare your desktop. Do not turn off the PC during this phase.
Finishing the Windows installation
Once installed, there are a few extra steps to ensure stability:
- Install Drivers: Install Chipset, Audio, and GPU drivers from the manufacturer’s website (Intel, AMD, Nvidia).
- Windows Update: Force a system update check to patch security vulnerabilities.
Default settings to review
- Remove Bloatware: Uninstall pre-installed apps you don’t need via Settings > Apps.
- Disable Telemetry: Go to Settings > Privacy to limit data sent to Microsoft.
- Change Default Apps: Set your preferred browser and photo viewer in Settings > Apps > Default apps.
- Delivery Optimization: Disable P2P updates in Windows Update settings to save bandwidth.
- Active Hours: Set active hours in Windows Update to prevent unexpected restarts.
Possible problems
Errors can happen. Here are common installation error codes and meanings:
| Error Code | Meaning / Solution |
|---|---|
| 0xC1900101 | Driver error. Disconnect peripherals, check disk space, or update drivers. |
| 0x80070070 | Insufficient disk space. Free up at least 20-30 GB. |
| 0x80300024 | Target drive/partition error. Delete partition and create new one. |
| 0x800F0922 | Connection error. Check VPN/Proxy settings or System Reserved partition space. |
| 0xC1900200 | Hardware requirements not met (RAM/CPU). |
Update Assistant Tool
You can use this official tool to update Windows 10 to the latest version:
Team Microespana.com
WhatsApp: 0034677285503