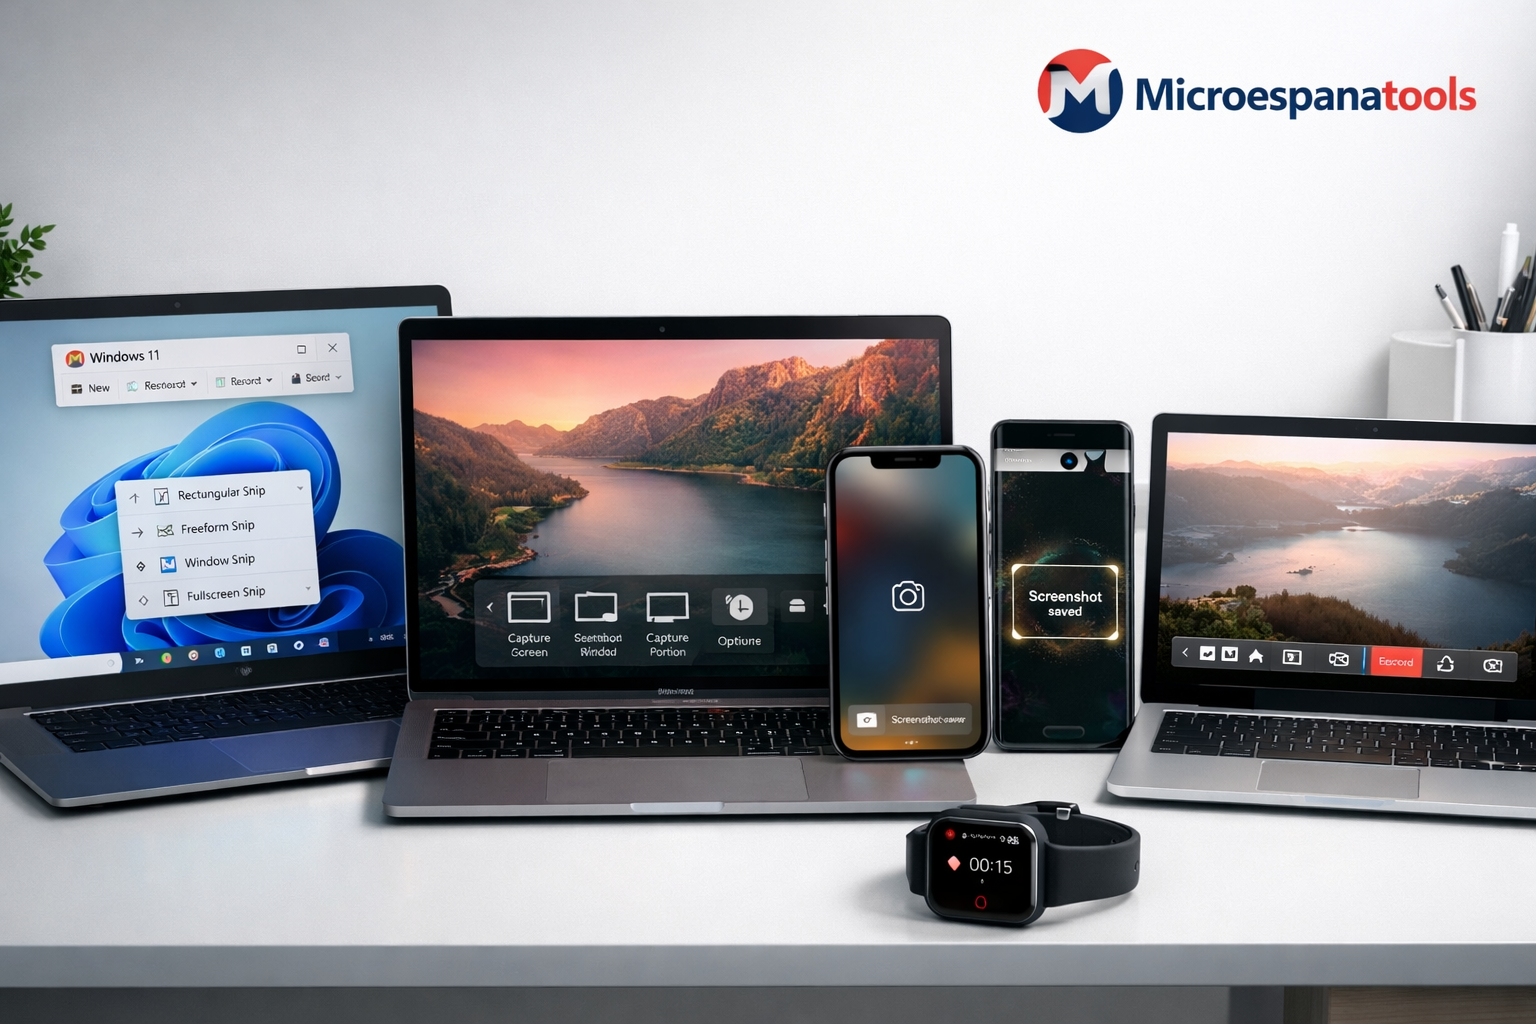
In today’s digital world, knowing how to Screen Record & Take Screenshots is more than a simple tech trick. It’s a practical skill you’ll use at work, school, and home. Whether you need a quick screen capture of a payment receipt or a detailed screen recording tool for a tutorial, these features save time and prevent confusion. A fast screen grab can document online errors, protect conversations, or store important updates before they disappear. From laptops to smartphones, mastering screenshot keyboard shortcuts helps you move confidently across devices without missing critical information when it matters most.
Online Tools & How-To
How to Screen Record & Take Screenshots on Any Device (Windows, Mac, iPhone & Android)
Microespana Admin
February 26, 2026
Why Screenshots Are Important (How to Screen Record & Take Screenshots on Any Device)
A screenshot is more than an image. It is evidence. When you take a screenshot, you freeze a moment before it disappears. In offices across the USA, workers rely on screen capture to document billing errors. Parents save school forms. Gamers store winning scores. Even doctors sometimes use secure captures for telehealth instructions.
Consider a short case study. A freelancer in Texas faced a payment dispute. She had saved confirmation using save screenshot to clipboard and uploaded it to OneDrive. The issue ended in minutes. That simple habit of learning how to screen record & take screenshots on any device saved her income. Screenshots also sync smoothly with Google Drive and Google Photos, keeping files safe in the cloud.
How to Take a Screenshot in Windows 10
On Windows 10, press the print screen button or PrtSc key to capture entire screen instantly. The image copies to clipboard. You can paste it into email or Paint. If you prefer precision, open Snipping Tool Windows for custom screen selection or to capture specific window. Many users also choose Snip and Sketch for quick editing.
Gamers and teachers often use Xbox Game Bar screenshot or its recording feature. Press Windows + G to open it. This works well on laptops and even a Surface tablet when you need a fast screenshot on Surface device.
| Action | Shortcut | Result |
| Full screen | PrtSc key | Copies image |
| Active window | Alt + PrtSc | Window only |
| Custom area | Windows + Shift + S | Opens Snip and Sketch |
Mastering these screenshot keyboard shortcuts helps you screen record & take screenshots on any device confidently.
How to Take a Screenshot in Windows 11
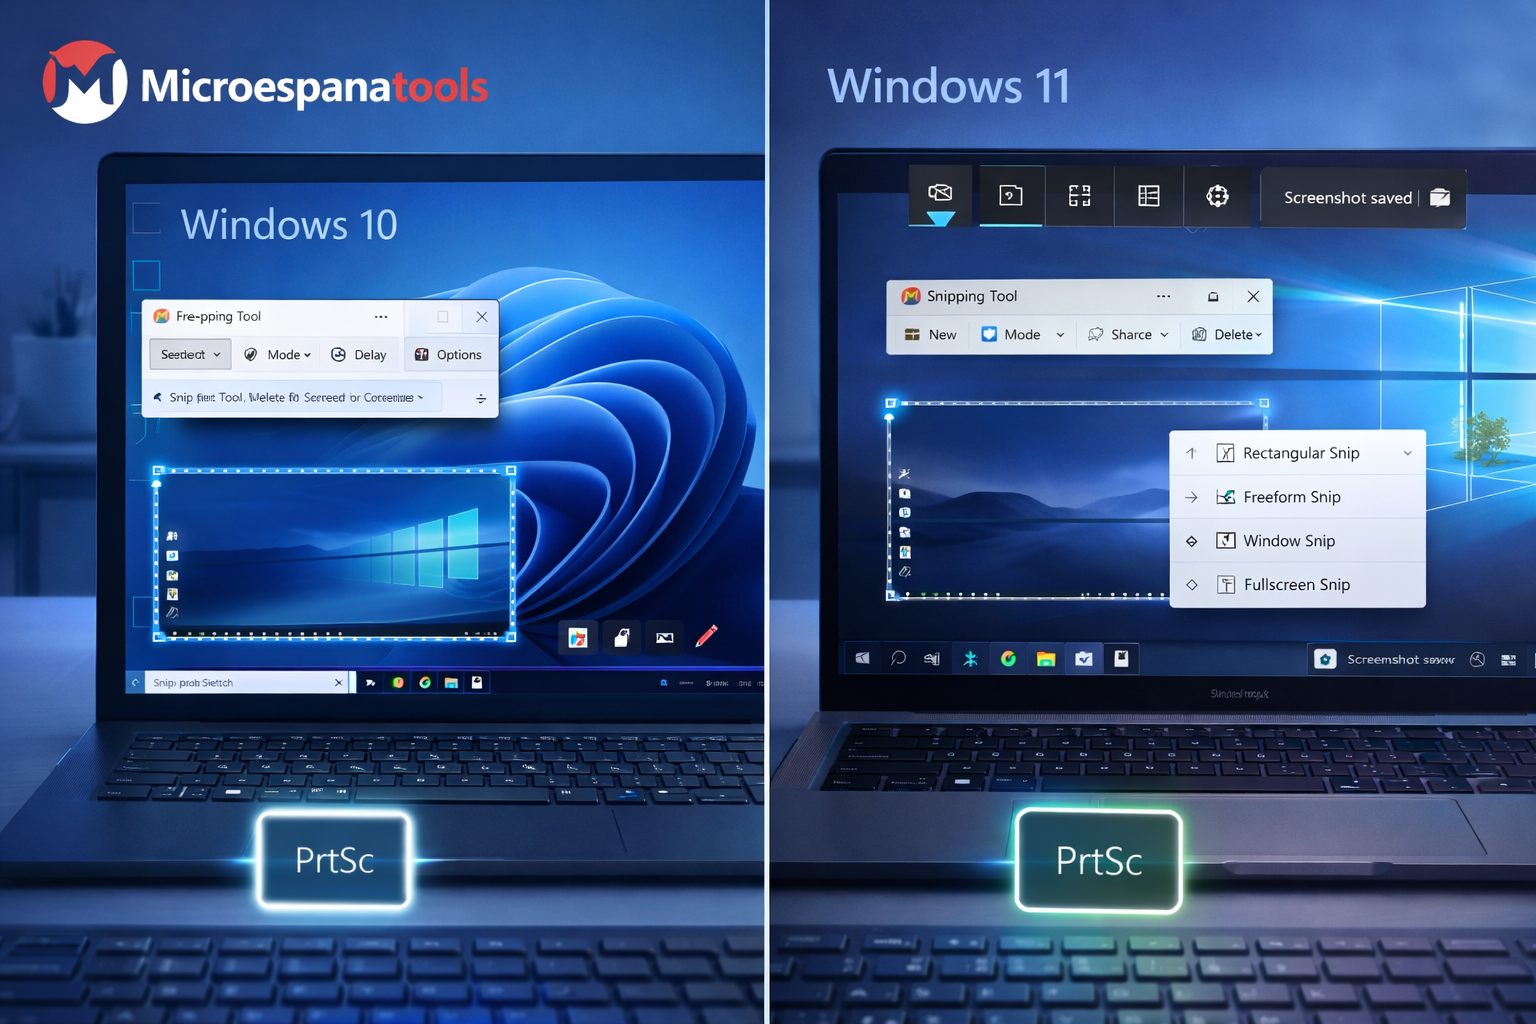
Windows 11 improves clarity and speed. The system merges Snipping Tool and Snip and Sketch into one smooth interface. Press Windows + Shift + S to start a custom screen selection. You can highlight, crop, or annotate screenshot before saving.
The interface feels cleaner than Windows 10. You can also record using built-in screen recording tool inside Snipping Tool. For business meetings, the Xbox Game Bar screenshot still works well. Many professionals say the updated layout reduces editing time by half. That is why knowing how to screen record & take screenshots on any device feels easier in this version.
How to Take a Screenshot on Mac
On macOS Sequoia and even older systems like macOS Mojave, Apple keeps things elegant. Press Command Shift 3 Mac to capture entire screen. Use Command Shift 4 Mac for custom screen selection. These macOS screenshot shortcuts save files directly to desktop.

You can also record video using QuickTime Player. Open it, choose New Screen Recording, and start. Many designers working on a screenshot on Mac use this for tutorials. If editing is required, Preview lets you annotate screenshot quickly. Apple’s smooth design makes it easy to screen record & take screenshots on any device.
How to Take a Screenshot on iPhone and iPad
On iPhone and iPad running iOS 18, press Volume Up + Side button. This is the standard volume down + power button style shortcut for Apple devices without a home key. If you use older models, press Home + Power. This method works well for a screenshot without home button setup too.
You can also capture screen on iPhone using Control Center recording. The markup tool iOS allows drawing arrows, highlighting text, or adding signatures. Safari supports full page screenshot iOS, perfect for long receipts. Many users take a screenshot on tablet for school forms. Learning these steps helps you screen record & take screenshots on any device smoothly.
How to Take a Screenshot on Android
On Android, press the volume down + power button together. This works on Google Pixel 9 and Samsung Galaxy S22 Ultra. After a screenshot on Android, editing tools appear instantly. You can crop, share, or save to Google Photos.
Voice assistants also help. Ask Google Assistant to take a screen grab. Samsung users can ask Bixby instead. Some devices allow scrolling capture for long pages. Android also supports built-in screen recording tool in quick settings. Once you practice, you will screen record & take screenshots on any device with ease.
How to Take a Screenshot on a Chromebook
On Chromebook running Chrome OS, press Ctrl + Show Windows key. This is the basic Chromebook screenshot method. Add Shift for custom screen selection. The built-in Chrome OS screen capture tool now supports video recording too.

Files save automatically in Downloads folder. Students often upload images to Google Drive within seconds. Because schools across the USA rely on Chrome OS, this feature saves time daily. The simplicity makes it practical for anyone learning how to screen record & take screenshots on any device.
How to Take a Screenshot on a Linux Device
On Ubuntu, press PrtSc for full screen. Use Shift + PrtSc for area selection. Advanced users may run a Linux screenshot command in terminal for timed captures. This is common in development environments.
Creative users prefer GIMP for GIMP screen capture and editing. If you need a quick screenshot in Ubuntu, built-in tools are enough. Linux offers flexibility. That freedom appeals to programmers who want complete control over how they screen record & take screenshots on any device.
Take a Screenshot on Apple Watch
To enable Apple Watch screenshot, open Watch settings on your paired iPhone. Turn on screenshots first. Then press Digital Crown and Side Button together. The image saves to Photos automatically.

Fitness fans often store activity summaries this way. It works well for sharing health milestones. Even small screens can produce clear captures.
Take a Screenshot on Apple Vision Pro
The Apple Vision Pro screenshot method uses the Top Button and Digital Crown together. This captures immersive mixed reality scenes. Files sync to Photos through iCloud instantly.
Developers use this for showcasing 3D apps. Educators record lessons inside virtual space. Spatial computing makes learning how to screen record & take screenshots on any device even more futuristic.
The Best Screen Capture Apps and Browser Extensions
Sometimes built-in tools feel limited. That is where third-party screen capture apps help. Professionals use Snagit or Lightshot for advanced editing. These apps support scrolling pages and cloud sharing.
For web users, browser screenshot extensions such as Awesome Screenshot capture full websites. They allow instant sharing to Google Drive or OneDrive. These tools enhance productivity when default options feel basic.
Taking Screenshots on Windows, Mac, iPhone & Android (Quick Guide Section)
If you want speed, remember this table.
| Device | Shortcut |
| Windows PC | PrtSc key |
| Mac | Command Shift 3 Mac |
| iPhone | Volume + Side |
| Android | Volume down + power button |
| Chromebook | Ctrl + Show Windows |
These shortcuts cover daily needs. Once you memorize them, you can take a screenshot, create a fast screen capture, or record a tutorial anytime. Master this skill once. Use it forever.